
I think it's here....oh please let it be here!!!
Enjoy the pic I took last year of these gorgeous tulips and the quote I added to it
 I'm taking a little break from making Quilt Class Kits for the Original Sewing and Quilt Expo in Worcester, MA on April 16,17 and 18th 2009.
 Click here, scroll down a wee bit till you see my name, and then you can see the classes I am teaching there:
As quilters, we sign up for a class we can't wait to take. I know that when I take a class and pay for my kit, I sure do hope it has everything I hoped for.....from soup to nuts and some. I would like to share the "birthing" of how I make my fully loaded class kits and perhaps it will give you an insight on just what is done to prepare for a class from a Quilt Instructors perspective.
 One of the classes I will be teaching is "The Dolphin Dance" one of my favorite classes. Who doesn't love Dolphins?
 Everything begins with the selection of fabrics. Yes, I hem and haw over what I think will be a good choice and just as you sometimes can't decide, I can't either because of all the wonderful choices of fabrics out there. Once I choose, the cutting begins after measuring what sizes will be needed for every single piece in the kit. So I cut, and cut and cut some more until every single fabric is done.
 I like to label my fabrics. If I am standing in front of the class talking about the under belly of the dolphin fabric, I want you to find it "fast". I print out on my computer all the labels for your fabrics in the kit and pin them on. (Tape just doesn't cut it)
 I begin with the biggest piece, fold it neatly and pin a label in place.
 I go to the next fabric, fold it, pin the label and start layering the fabrics on top of one another.
 This is what all the the cut fabrics look like...layered,labeled and ready for you to use.
 I like to use large bags so that the project can be put inside neatly for you to go home with. I label every bag with "you" in mind. What things do you need to know on that label? My name would be a good start! hehe. My email is on there in case you need or want to email me with a question or just to chit chat or tell me you liked the class. My website is on there and I now have started to put my blog address on it too....what better way to keep up with what's going on with your instructor!!!. The labels are printed, cut out by scissors or paper cutter and then they are all taped on.
 All my instructions are photographic tutorials. I designed my patterns to be very visual, because that is the way I would like to get a pattern. They are either printed off from my printer or I usually have volume printed at my printer, collated of course.
I need to get doodling again in hopes I can put a doodle up on my next blog entry.....I would love to hear from all of you...
 One of the classes I will be teaching is "The Dolphin Dance" one of my favorite classes. Who doesn't love Dolphins?
 Everything begins with the selection of fabrics. Yes, I hem and haw over what I think will be a good choice and just as you sometimes can't decide, I can't either because of all the wonderful choices of fabrics out there. Once I choose, the cutting begins after measuring what sizes will be needed for every single piece in the kit. So I cut, and cut and cut some more until every single fabric is done.
 I like to label my fabrics. If I am standing in front of the class talking about the under belly of the dolphin fabric, I want you to find it "fast". I print out on my computer all the labels for your fabrics in the kit and pin them on. (Tape just doesn't cut it)
 I begin with the biggest piece, fold it neatly and pin a label in place.
 I go to the next fabric, fold it, pin the label and start layering the fabrics on top of one another.
 This is what all the the cut fabrics look like...layered,labeled and ready for you to use.
 I like to use large bags so that the project can be put inside neatly for you to go home with. I label every bag with "you" in mind. What things do you need to know on that label? My name would be a good start! hehe. My email is on there in case you need or want to email me with a question or just to chit chat or tell me you liked the class. My website is on there and I now have started to put my blog address on it too....what better way to keep up with what's going on with your instructor!!!. The labels are printed, cut out by scissors or paper cutter and then they are all taped on.
 All my instructions are photographic tutorials. I designed my patterns to be very visual, because that is the way I would like to get a pattern. They are either printed off from my printer or I usually have volume printed at my printer, collated of course.
 Each set must be checked and stapled.
 I always include the master pattern inside in case you want to make more than just one, so just like above, they are all stapled together.
 I am pretty sure that everyone knows how to trace, so I have the project already printed on the freezer paper just waiting for you to get your hot little paper scissors out to start cutting. I cut the bottom corner off so that you won't get confused between freezer paper and master pattern.
 In a class where "Everything" is included, the thread must be provided. I carefully shop and pick the perfect colors to coordinate with the chosen fabrics.
 I included paperclips, I wouldn't want your dolphin to be without a fin or underbelly, so the plastic coated paperclips hold them together for when your ready to sew. Why the plastic coated ones? Because they tend to not get snagged or rip the freezer paper.
 I always include the master pattern inside in case you want to make more than just one, so just like above, they are all stapled together.
 I am pretty sure that everyone knows how to trace, so I have the project already printed on the freezer paper just waiting for you to get your hot little paper scissors out to start cutting. I cut the bottom corner off so that you won't get confused between freezer paper and master pattern.
 In a class where "Everything" is included, the thread must be provided. I carefully shop and pick the perfect colors to coordinate with the chosen fabrics.
 I included paperclips, I wouldn't want your dolphin to be without a fin or underbelly, so the plastic coated paperclips hold them together for when your ready to sew. Why the plastic coated ones? Because they tend to not get snagged or rip the freezer paper.
Inside your kit you get a glue stick cause that's the method I teach and the "special little toothpicks too.
 If the class is hand applique, you'll need an applique needle. I buy those felt pieces in the craft section of the store, cut them into little squares and weave your needle into it. The felt also helps you not lose your needle!
 And from the printer, I pick up your full size pattern.
 The "Dolphin Dance has some stars in the sky. The strands are separated, measured to the size you'll need (I always measure more than needed in case you want a very starry sky). Each strand it rolled into a little circle so that it doesn't tangle.
 Of course you'll need a color picture with your project
 That brownish paper you see isn't dirty or burnt. If I am lucky, my mom's friend gives me the wax coated board that separates the truffles she sells. Yep...truffles!!! Hmmm...I never get the truffles, just the wax board. The board is a great surface for you to glue on. It wipes clean and can be reused. I wipe each one clean before I cut each one in half and put it into your kit. Again, they go in your kit if the "Truffle Lady" had a good truffle selling week! Otherwise, I insert a piece of cardboard into your kit.
 Presentation is EVERYTHING. I put my kits together just the way I would like to receive one. I like to see what my fabrics are first, so they are in the front of everything along with the colored picture. There is a method to all of this. In class, I go through everything inside your kit before we begin. (Ya never know if I was packing up a kit close to midnight. Just in case, and it rare, if you are missing anything, I travel with spares of everything)
 So, this kit should be perfect for you to take on your travels too. It has everything you will need. I hope you enjoyed the "birth" of a class quilt kit!
 If the class is hand applique, you'll need an applique needle. I buy those felt pieces in the craft section of the store, cut them into little squares and weave your needle into it. The felt also helps you not lose your needle!
 And from the printer, I pick up your full size pattern.
 The "Dolphin Dance has some stars in the sky. The strands are separated, measured to the size you'll need (I always measure more than needed in case you want a very starry sky). Each strand it rolled into a little circle so that it doesn't tangle.
 Of course you'll need a color picture with your project
 That brownish paper you see isn't dirty or burnt. If I am lucky, my mom's friend gives me the wax coated board that separates the truffles she sells. Yep...truffles!!! Hmmm...I never get the truffles, just the wax board. The board is a great surface for you to glue on. It wipes clean and can be reused. I wipe each one clean before I cut each one in half and put it into your kit. Again, they go in your kit if the "Truffle Lady" had a good truffle selling week! Otherwise, I insert a piece of cardboard into your kit.
 Presentation is EVERYTHING. I put my kits together just the way I would like to receive one. I like to see what my fabrics are first, so they are in the front of everything along with the colored picture. There is a method to all of this. In class, I go through everything inside your kit before we begin. (Ya never know if I was packing up a kit close to midnight. Just in case, and it rare, if you are missing anything, I travel with spares of everything)
 So, this kit should be perfect for you to take on your travels too. It has everything you will need. I hope you enjoyed the "birth" of a class quilt kit!
Every quilt instructors kit will be different. We all have our way of doing things and put a little piece of ourselves into the kit. If you can' take a class from me, "The Dolphin Dance" is also a pattern that can be purchased at my website...(fabric not included).
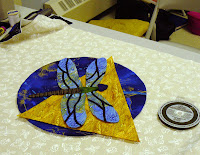
 And....I just couldn't leave you here without .....


 And....I just couldn't leave you here without .....
YOUR COLOR FIX FOR TODAY




 Posts
Posts


